Sunday, 18 October 2015

Purchase Order Accounting in AX 2012

The accounting impact of PO happens at two stages:
1. At PO product receipt(Or packing slip) posting.
2. On PO Invoice
PO Product Receipt
When receipt is posted, two sets of ledger entry is posted:
1.
Purchase expenditure, un-invoiced – Debit
Purchase, accrual – Credit
2.
Product receipt – Debit 
Purchase expenditure, un-invoiced – Credit 
Now, the important thing here to notice is the set of ledgers. The first set is liability booking for vendor while the second set represents open inventory. Here we notice that Purchase expenditure, un-invoiced is offsetting both accrual and receipt but they act differently. Things will be more clear after we discuss PO Invoice accounting
PO Invoice 
At the time of invoice, the accrual and product receipts are reversed and main account are hit. Following are the set of entries:
1.
Purchase expenditure, un-invoiced – Credit
Purchase, accrual – Debit
Purchase expenditure for product – Debit 
Vendor balance (Accounts payable) – Credit
2.
Product receipt – Credit 
Purchase expenditure, un-invoiced – Debit
Purchase, product receipt – Debit 
Purchase expenditure for product – Credit
So we see here that the one set of account is vendor and other is inventory. The very important to notice here is to look closely at purchase expenditure, un-invoiced account. Please note that it is not necessary that this account balance will always be 0 which it looks like. This ledger is running separately for vendor and inventory and in case of purchase return order where the inventory is issues at weighted average cost, there is a great chance that the vendor will hit by some amount and inventory will hit by some other amount unless you use marking feature.

Monday, 12 October 2015

BOM Journal Posting in AX 2012

BOM journals are being used in the Production Module.Bill of material journal is used in order to receive the finished good into inventory and issue the component items.Unlike any other journals, like Movement Journal Posting or Counting Journal posting, BOM journal posting is little bit different. Lets discuss on the same in details.

First of all, we need to create a product with Production type as BOM for the item on which BOM posting will be done under the Engineer fast tab.
Navigation: Product Information Management > Common > Products > Released Products
NOTE: Given the Name of the BOM item as Finished Good-BOM.
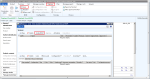
Pic-1
Now I am taking some general items (Item name- Test-1, Test-2 and Test-3) having the Production type as None and attaching these items into the BOM item (Finished Good-BOM) that we have created just before.
NOTE: The general items that will be attached with the BOM item (Finished Good-BOM)
Taking the BOM item > Engineer Ribbon > BOM pane > Lines > Create BOM
Pic-2

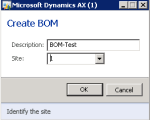
Enter a description under the BOM and enter the site and then click OK.
pic-3
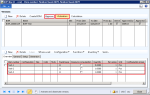
Attach the items into the BOM lines and then Approve and Activate the BOM by clicking the  Approve and Activate button.
Pic-5
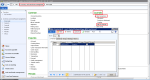
Now Navigate to Inventory & Warehouse Management >Journals > Item Transaction > Bill of Materials. Click New Journal and go to lines.
Pic-6

Now click BOM > Reported as Finished

pic-8
Now create a new entry (Cntrl + N) and select the item ( as we have used this item Finished Good-BOM). Select the BOM under the BOM field.
NOTE:  Make the Post Now field as unchecked. Explosion as always. And then click OK
Pic-9
Now once I click OK, the lines will come under the original journal lines form.
pic-10
NOTE: the negative sign shows that this item is being consumed.
Click Validate to Validate the Journal
pic-11
Click Post to Post the Journal
pic-12

Create a Purchase requisition

The objective of this article is to describe how to create and submit a Purchase requisition in Dynamics AX 2012.
You can create a purchase requisitions for products that your organization uses. A purchase requisition is an internal document that authorizes the purchasing department to buy items or services. To be able to create a purchase requisition, a workflow has to be setup.

Create a Purchase Requisition

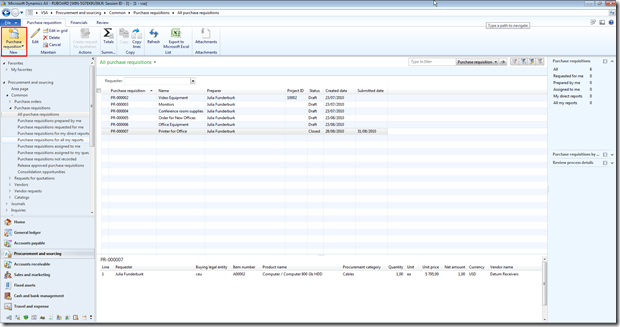
Access: Procurement and sourcing > Common > Purchase Requisitions > All purchase Requisitions
  • Click New
image
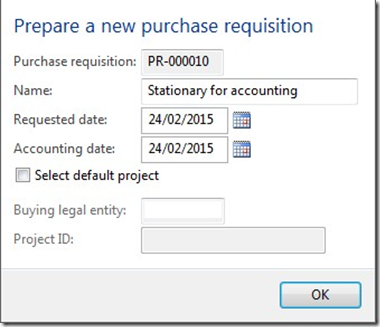
  • Enter a description
  • Select the Requested date
image
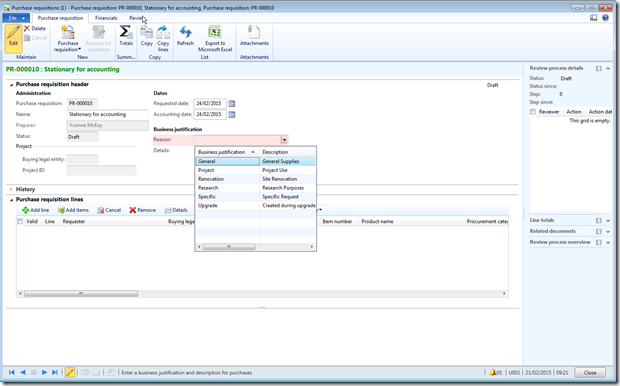
The PR line form is opened
  • Select a Reason (the reason can be setup as mandatory in the purchase policy)
image

Create the line with option “Add item”

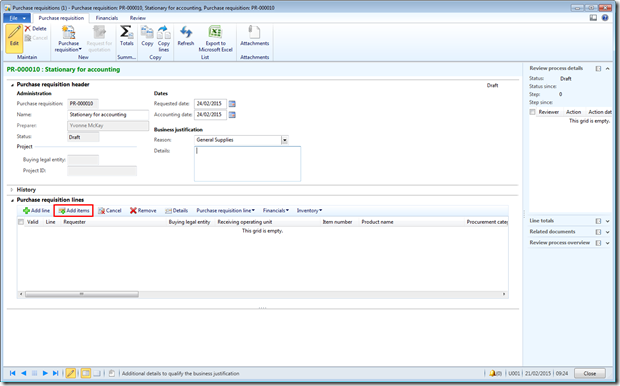
  • Click “Add Item”
image
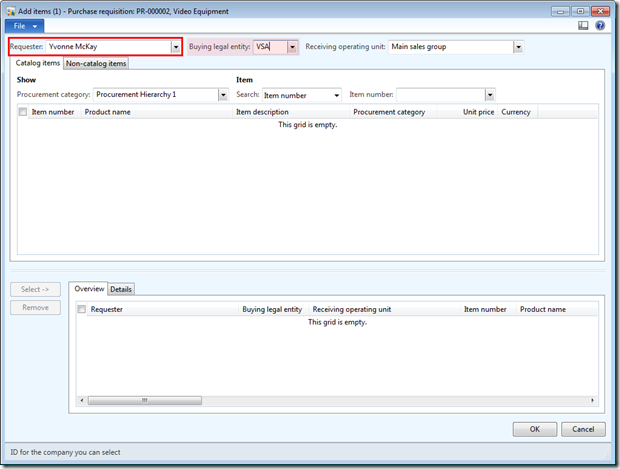
  • Select the Requester of the PR
The default value is the worker linked to the user, but it is possible to setup rules to allow one user to create purchase requisition on behalf of others workers
  • If the worker is an employee of several companies, select the buying entity
image

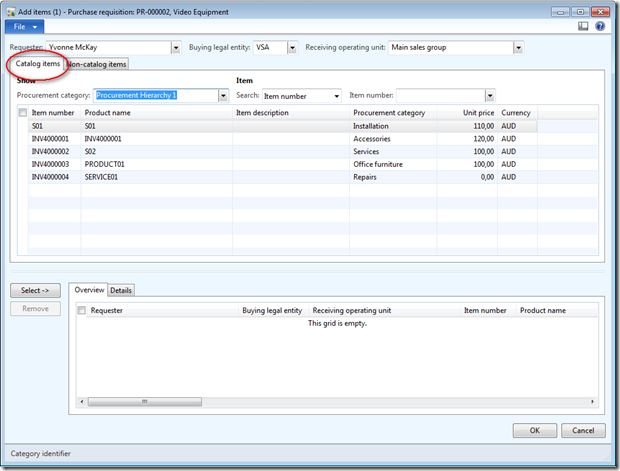
Option A: Select a catalogue item

  • Go to the Catalogue Items to select a product (the product need to be include in a Procurement category)
image
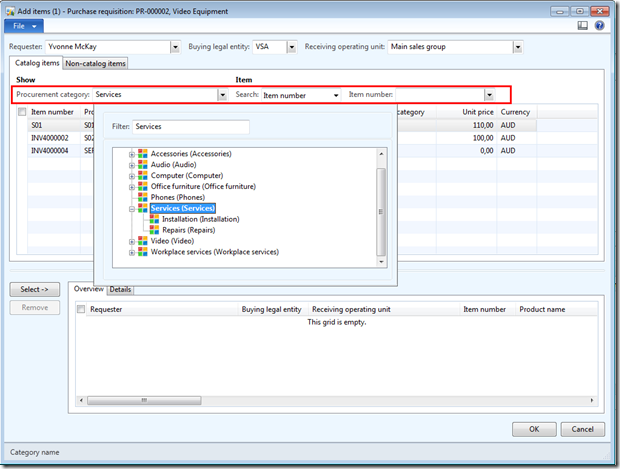
  • Use the filter to find the item
image
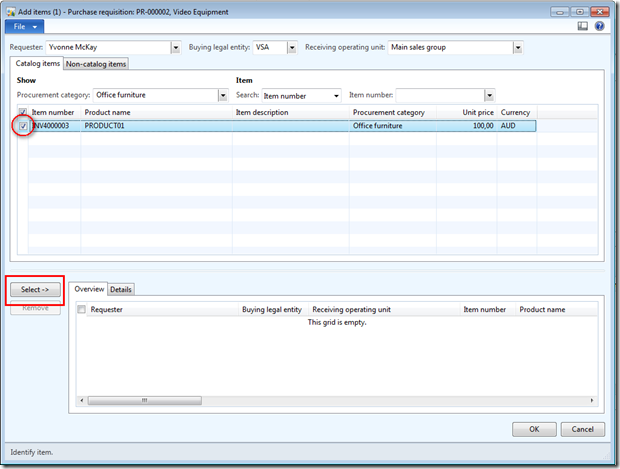
  • Select the item and click “Select”
image
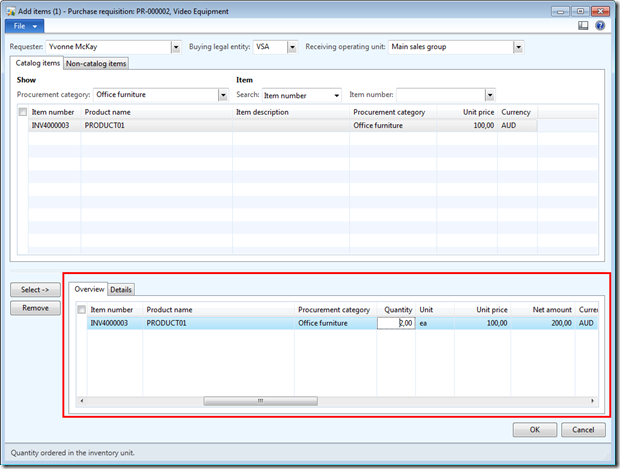
  • Enter the quantity
  • Vendor and price are coming from the items setup
  • Go to the detail tab to select the inventory dimensions
  • And click “OK” to add the item to the purchase requisition
image
Option B: Non catalogue item
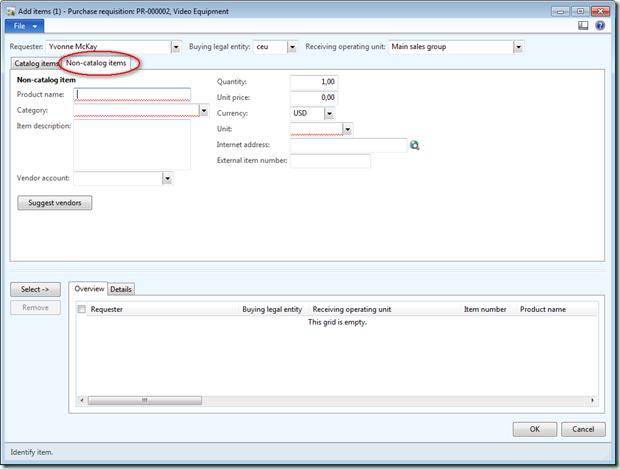
  • Go to the Non catalogue Items to select request an item that is not available in the catalogue.
image
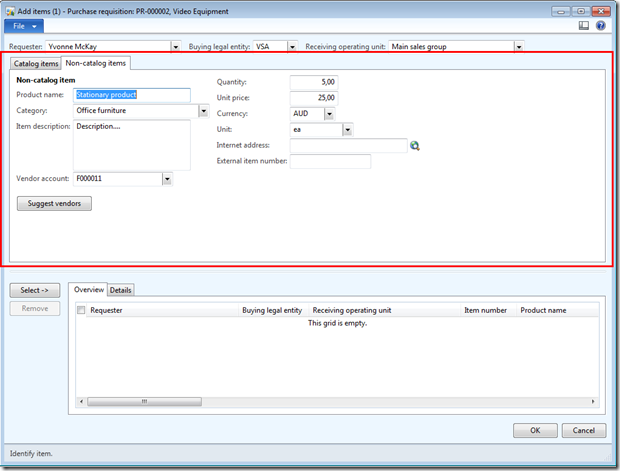
  • Enter the Product name
  • Select the category of the product
  • Enter a description of the product
  • Select a vendor or suggest a vendor
  • Complete the information with quantity, unit and price
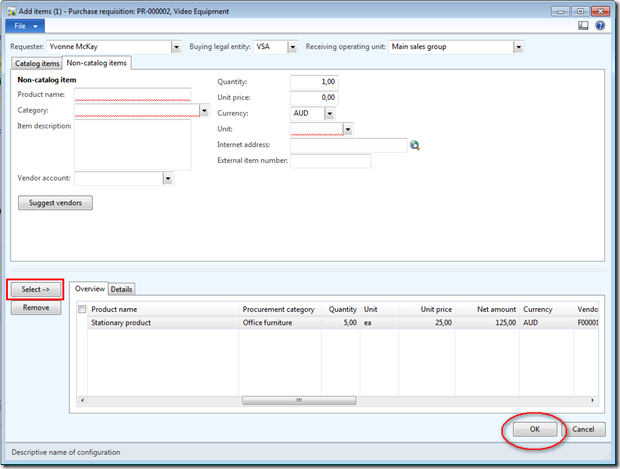
image
  • Click “Select”
  • Go to the Details tab to select the inventory dimensions (Site, Warehouse)
  • And click “OK”
image
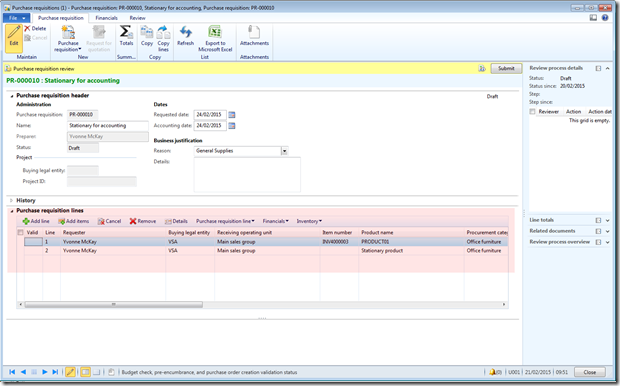
Lines are added to purchase requisitions
image

Create the line with option “Add Line”

If you know what the item you need, use this option
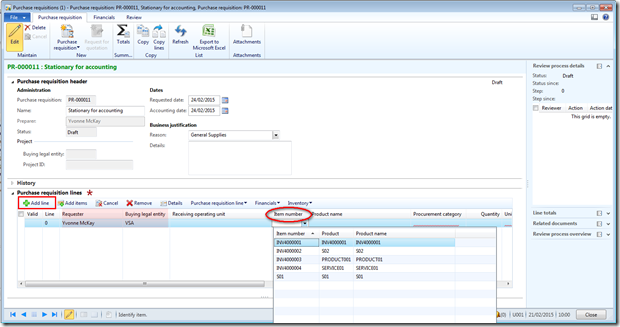
  • Click “Add Line”
  • Select the requester and the buying entity
  • Select the item
image
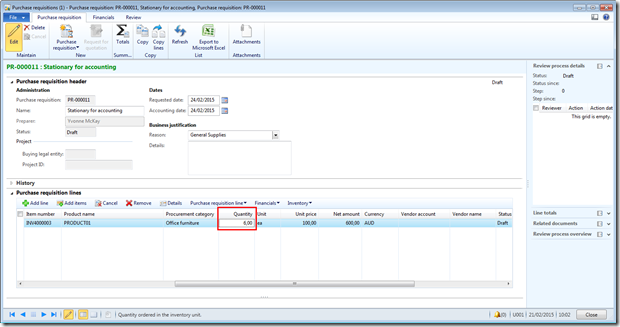
  • Enter the quantity
  • Unit price and vendor are coming from the item setup
image
Complete and Submit the PR
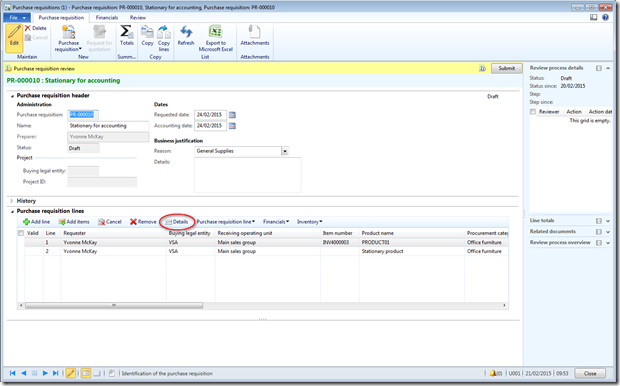
You can click “Details” to Edit the line and complete the information (Financial dimensions for example)
image
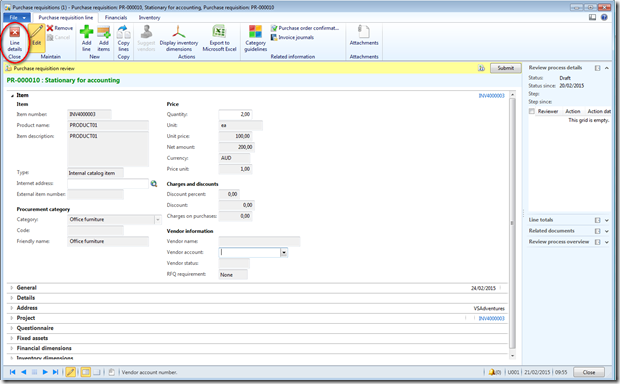
To go back to the Purchase requisition form, click “Close line details”
image
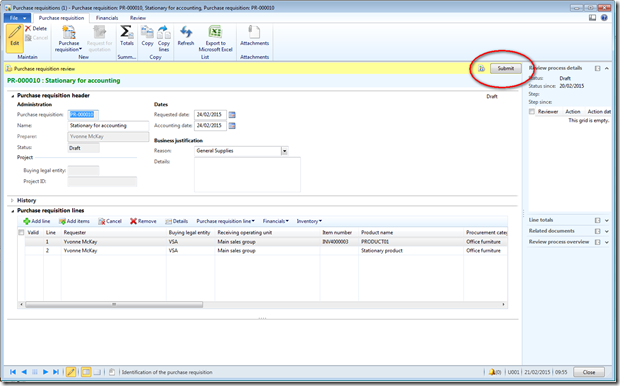
Once the purchase is ready, click “Submit” to submit the PR to the workflow for approval.
image

ONE INVOICE FOR MULTIPLE PURCHASE ORDERS IN AX 2012

Post single invoice for multiple Purchase orders

There might be a case where the vendor sends a single invoice for multiple purchase orders, in this scenario we will see how to post one invoice for multiple purchase orders of the same vendor.
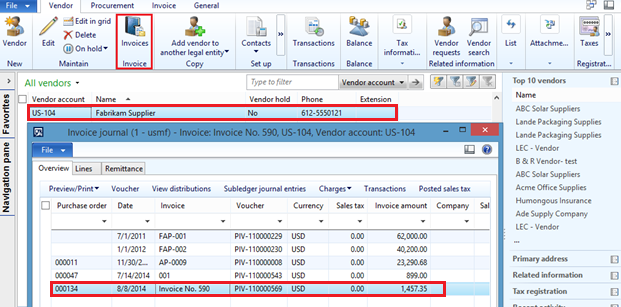
We are having two PO’s for the same vendor “US- 104 Fabrikam Supplier”
PO Number        Qty         Unit Price            Net Price
000134                  10           27.25                     272.50
000135                  15           78.99                     1184.85
Consolidated Net Price for Two PO’s is 1457.35
Step 1: Select the Two Purchase Order
Navigation: Procurement and sourcing> Common> Purchase orders> All purchase orders
  • Select the Two PO’s
  • Click on the Invoice tab
  • Then click on Invoice button
PO
Step 2: Consolidate the Two Purchase orders
  • Enter the same invoice number for the two purchase orders
  • Then click on the Consolidate invoices button
  • Under the Summary update select “Invoice account”
  • Then click on the Consolidate to merge the two PO’s into one
PO Consolidate
Step 3: Total amount of the two Purchase Orders
  • The Two Purchase orders are now consolidated
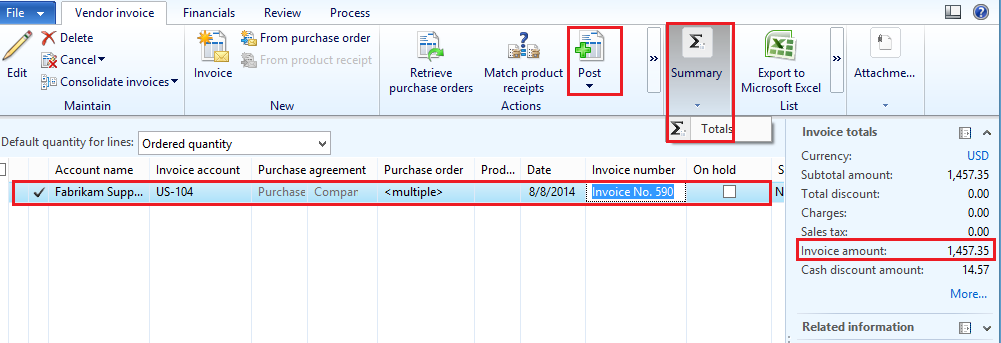
  • To check the Invoice amount – click on Summary – Totals or can view on the right side of the form
  • Click “Post” to complete the Purchase Order
PO Post
  • We can get the Print of the Invoice as shown below:
PO Print
Step 4: Verify the status of the Purchase Orders, its showing as “Invoiced”
Navigation: Accounts Payable > Common Forms > All Purchase Orders
PO Status
Step 5: Check the Vendor Invoiced entries
Navigation: Accounts Payable > Common Forms > All Vendors
  • Select the vendor “US-104”
  • Click on Invoice button to view to posted invoices
PO Transactions

Purchase requisition workflow

This article describes how to set up in the purchase requisition workflow the approval element done by the project manager.

1/ Create a workflow Participant

Access: Procurement and sourcing > Setup > Policies > Purchase requisitions expenditure reviewers
  • Click “New” to create a new expenditure reviewer
  • Select the company
  • Select “Project Manager”
image

2/ Setup the workflow

Access: Procurement and sourcing > Setup > Procurement and sourcing workflow
In the workflow, line or header level, add a condition element to check if there is a project populated in the purchase requisition:
image
  • Click “Properties”
  • Enter a new title
  • Select the condition:
image
Add a new approval element
image

Click “Properties” and enter all the information:
  • Title
  • Notifications
  • Actions allowed
image
Go to the level down, to complete the approval step
image
  • Populate all the text required in the Basics settings
  • Click “Assignment”
  • Select “Participant”
image
In the Role base tab:
  • Select Type of participant =  Expenditure participants
  • Select participant = Project manager
image
  • Complete the time limit and the completion policy
Check that the error panel is empty and save the new version of the workflow
image
The workflow is going to refer to the project setup, to assign the approval to the project manager:
image